
[wpdatatable id=2]
Category: GCAS
GCAS is a one-stop solution for all Government Universities, Higher Education Institutes, Government Colleges, Grant-In-Aid Colleges, and SFIs affiliated with Public Universities across the state of Gujarat. This comprehensive portal is strategically crafted to simplify the admission procedure, consolidating all requisite information and services to facilitate a seamless experience for the students of Gujarat.
-
GCAS Admission Process
1. The student needs to login to the portal with the User ID and Password as provided post-registration.
2. An OTP will arrive at the registered Email ID and Contact Number.
3. Post Login, the student will be able to access the application form.
4. The student will have to shortlist the course/s and the Universities/ Colleges offering respective courses in the state. The student may choose as many streams, courses or universities/ colleges as they wish.
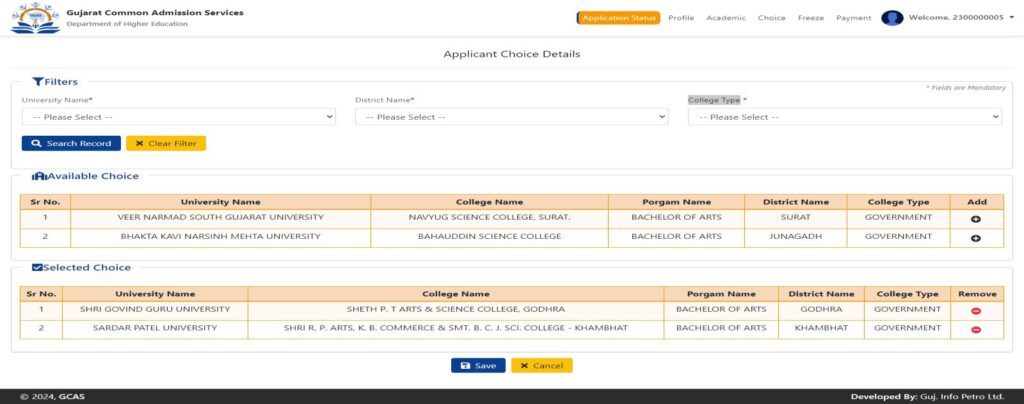
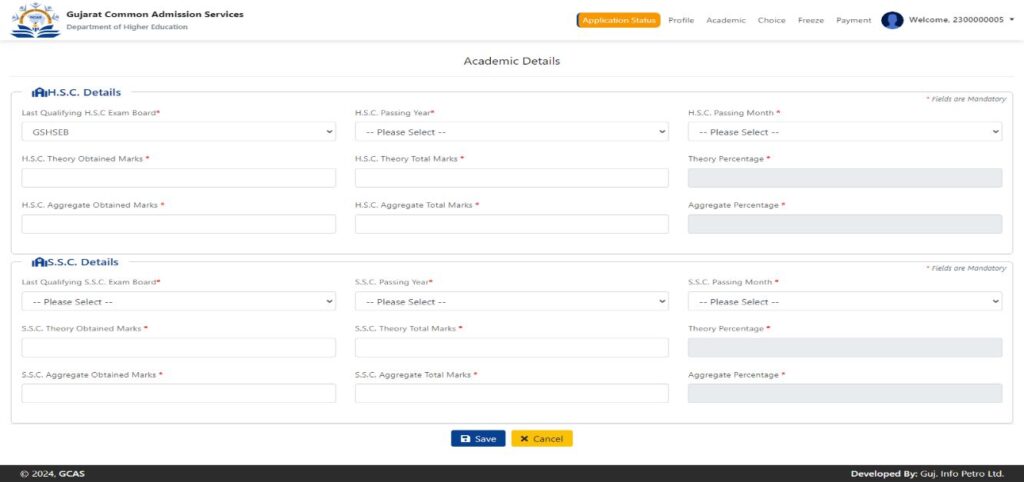
5. Post-selection of the courses and their relevant Universities/ Colleges, the student will need to fill out an application form.
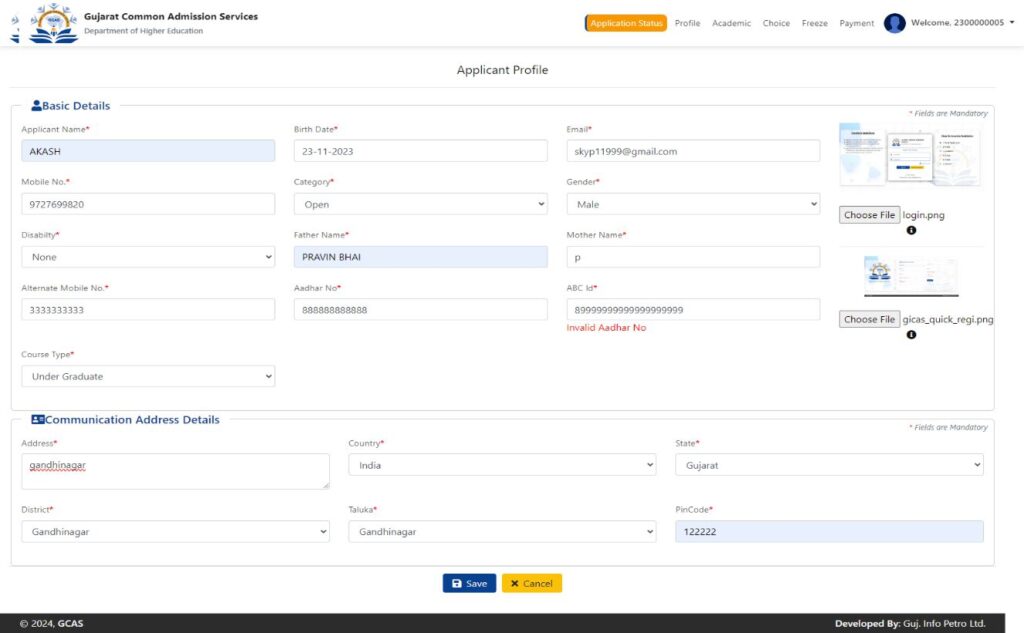
6. While filling out the application form, a few things are to be considered:
- Name: The student needs to fill in his/her name, exactly as it is mentioned in their
HSE Marksheet/ 12th Standard Marksheet. - Date Of Birth: The student needs to submit the Date of Birth in DD/MM/YYYY format exactly as it is mentioned in their Higher Secondary Examination Marksheet (HSE)/ 10th Marksheet.
- Category: Relevant document proofs for the category need to be uploaded by the students of EWS (Economically Weaker Section) of General Category, SC (Scheduled Caste), ST (Scheduled Tribe), OBC (Other Backward Caste) & SEBC (Socially and Economically Backward Class category and Nomadic Tribes and De-notified Tribes.
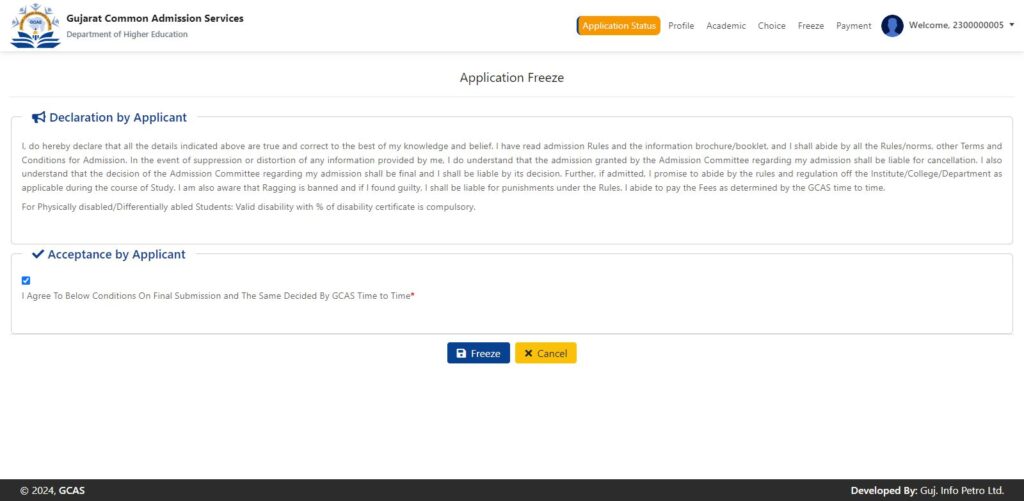
1. Review of the filled application form. (It is recommended to revisit the entire application form before final submission)
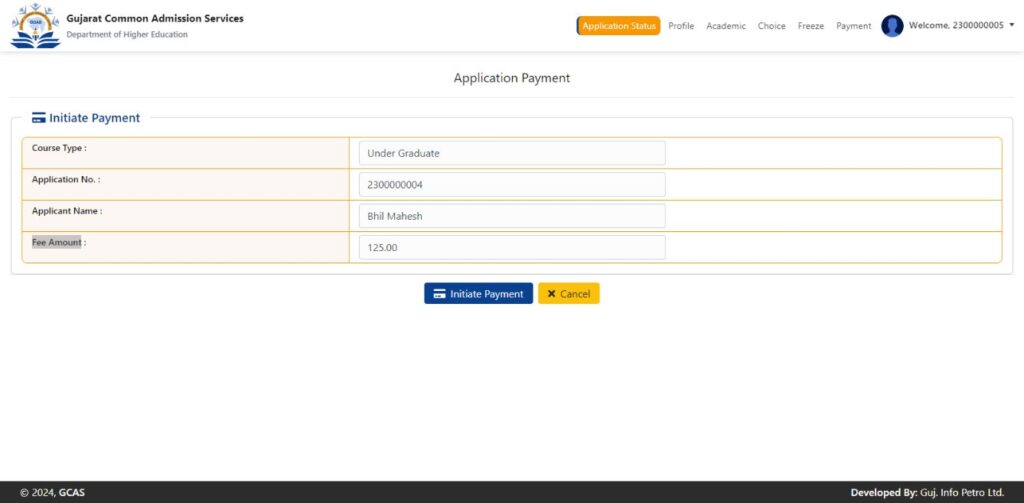
2. Application fee payment through the provided Payment Gateway link. (One-time application fee payment for the selection of unlimited Universities/ Colleges, Streams, and Courses).
3. The filled application form will automatically be sent to the respective email ID of the student.
4. Final submission by the student.
5. Submitted applications will be sent to all the Universities/ Colleges chosen by the student.
6. Each University/ College will create separate merit lists of the students. The University/College may be asked to create a merit list and send emails to the students as per their merit list.
7. Based on the merit list, the chosen student will visit the University/ College for document verification and fee submission.
8. University/ College will confirm and enrol the student.
Other Important Instruction:
1. It is mandatory to answer all the questions before the final submission.
2. Always make sure to provide an updated email ID and Contact number. All updates regarding the application form will be sent to this number.
3. It is mandatory for the student to submit an active contact number of parents/ guardians.
4. It is mandatory to enter all the qualification-related details correctly. This helps Universities/ Colleges in shortlisting the submitted application forms.
5. The student needs to visit the University/College after receiving an email from the chosen list of Universities/Colleges for document verification and final enrolment.Disability: If a student is differently abled, then he/she needs to submit a certificate of more than 45% of Physical Disability.
- Name: The student needs to fill in his/her name, exactly as it is mentioned in their
-
BCA Collage GCAS
[wpdatatable id=1 table_view=regular]
-

GCAS User/Student registration process
New User ID Creation:
- Visit the GCAS website
- Look for an “Apply Now” option or register through the online registration link: “https://gcas.gujgov.edu.in/”
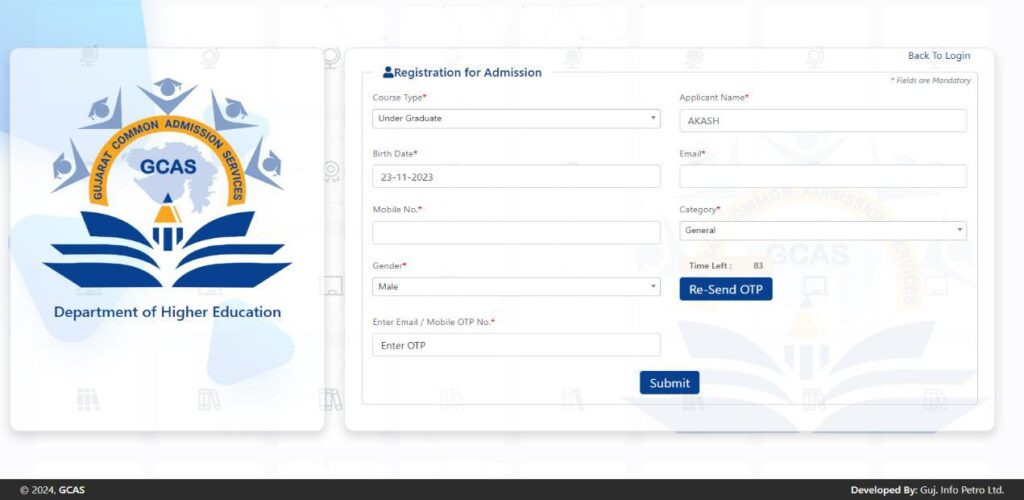
3. Online registration form filling with the required personal details
- Name: The student needs to fill in his/her name, exactly as it is mentioned in their
HSE Marksheet/ 12th Standard Marksheet. - Date Of Birth: The student needs to submit the Date of Birth in DD/MM/YYYY format exactly as it is mentioned in their Higher Secondary Examination Marksheet (HSE)/ 10th Marksheet.
- Mobile No: In the format Country Code with the Ten Digit Mobile Number e.g. (91) 9632388997 (the student needs to share a valid mobile number which is easily accessible throughout the admission process)
- Email ID: The student needs to provide a valid email ID. E.g. [email protected], [email protected] and others.
4 .Review & final submission
5. An OTP will arrive at the registered Email ID and Contact Number.
6. ID Creation of the User
7. The Username and Password will be sent to the relevant Email ID and Contact Number.
8. The student needs to immediately change the password post registration.Note: A unique student ID will be created post-registration by the website. The student needs to use
those credentials (i.e., Username and password) while logging in. -
ઉમેદવારની નોંધણી અને પ્રવેશપ્રક્રિયા – ઉમેદવારનું નું ID બનાવવું
A. ઉમેદવારનું નું ID બનાવવું
1. GCAS વેબ સાઇટ પર જવું
2. ‘Apply Now’નો વવકલ્પ શોધવો, અથવા ‘www.GCAS.edu.in’ ઓનલાઈન રજિસ્ટ્રેશન link દ્વારા રજિસ્ટ્રેશન કરવું.
3. જરૂરી વક્તગત વિગતો સાથે ઓનલાઈન નોધણી ફોર્મ ભરવાની પ્રકિયા :
- નામ : HSC marksheet હોય તે પ્રમાણેન ઉમેદવારે પોતાનું નામ ભરવાનું રહેશે.
- જન્મતારીખ : ઉમેદવારે તેમની ઉચ્ચતર કધ્યમિક પરીક્ષાની Marksheet HSE કે 10મા ધોરણની Marksheet ઉલ્લેખ કયાા
મ જબ DD/MM/YYYY formate એટલે કે તારીખ, મહિન અને વર્ષ પ્રમાણે જન્મતારીખ નોંધવાની રહેશે. - મોબાઇલ નુંબર : જે ર્ે દેશના કોડ સાથે10 અુંકનો મોબાઇલ નુંબર નોંધવો. દા.ર્. (91) 9632388997. (સમગ્ર
પ્રવેશપ્રક્રિયા દરવમયાન સ લભ હોય, વપરાશમાું હોય ર્ેવો માન્ય મોબાઇલ નુંબર ઉમેદવારેનોંધવાનો રહેશે.) - • ઈ-મેઈલ આઈડી : ઉમેદવારેમાન્ય ઈ-મેઈલ આઈડી આપવાન ું રહેશે. દા.ર્. [email protected], [email protected]
અથવા ર્ો અન્ય.
4. ચકાસણી અનેનોધણીન ું અુંવર્મ સોપાન – ફાઈનલ સબવમશન
5 રજિસ્ટર્ડ ઈ-કેઇલ આઇડી અને મોળાઈલ નંબર પર એક OTP આવશે.
6 ઉમેદવારે આઇડી બનાવવું.
ઈ-મેઇલ આઇડી અને મોબાઈલ નંબર પર યુઝરનેમ અને પાસવર્ડ મોકલવા આવશે.
7 ઉશેદવારે રજેસ્ટ્રશન પછી તરત ૪ પોતાનો પાસવર્ડ બદલવાનો રહેશે.નોધ: રજિસ્ટ્રશન કર્યા પછી ઉમેદવારનું પોતાનું ખાસ આઇડી વેબસાઈટ પર બનાવવામાં આવશે. લોગ ઇન કરતી વખતે ઉમેદવારે
પોતાની ઓળખ (યુઝરનેમ અને પાસવડીનો ઉંપવોગ કરવાનો રહેશે. -
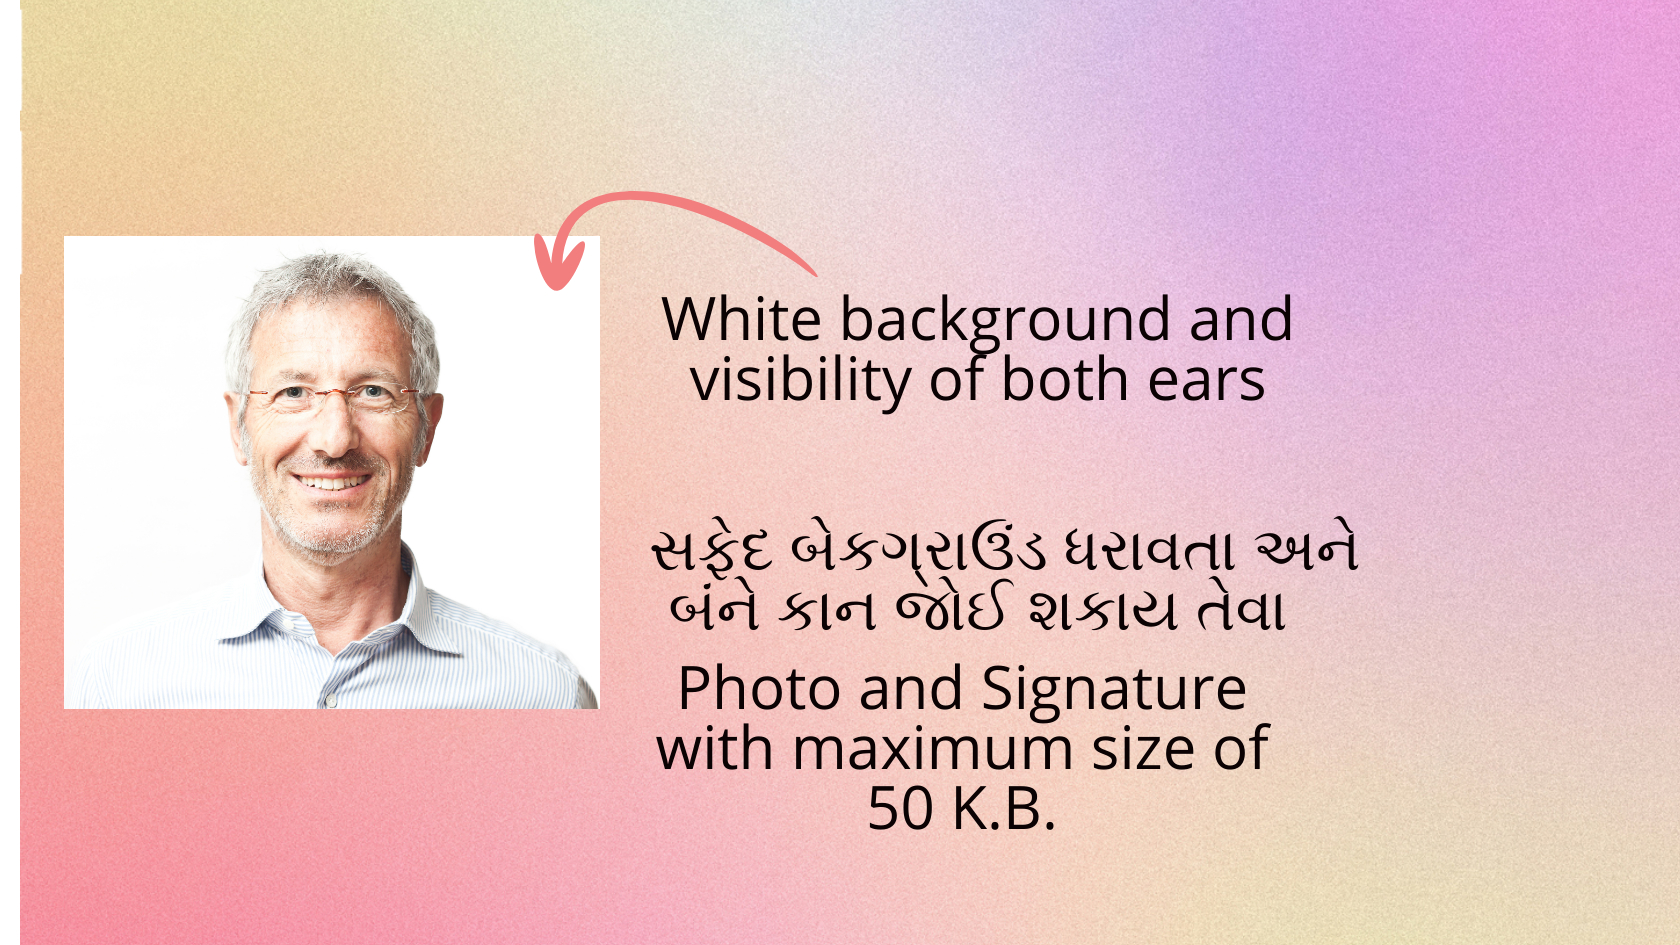
Passport Photo and Signature requirement for GCAS

- White background and visibility of both ears
- Applicant must have latest Photo and Signature with maximum size of 50 K.B.
How to reduce photo size online fo GCAS.
For this sample I sample passport photo size is 450KB , I want to reduce it to 50KB.
Go to this https://ezgif.com/optimize
Upload Image
Select this option choose option 48KB “fit file size in”
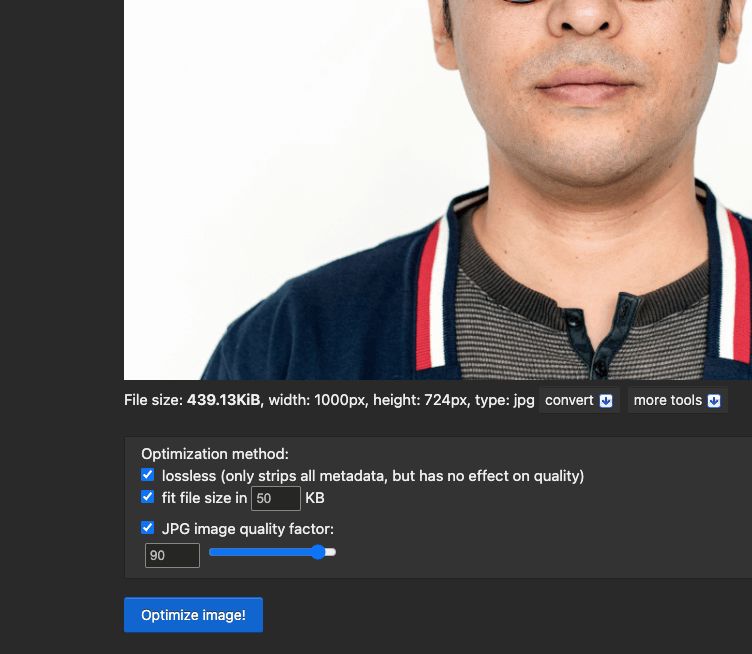
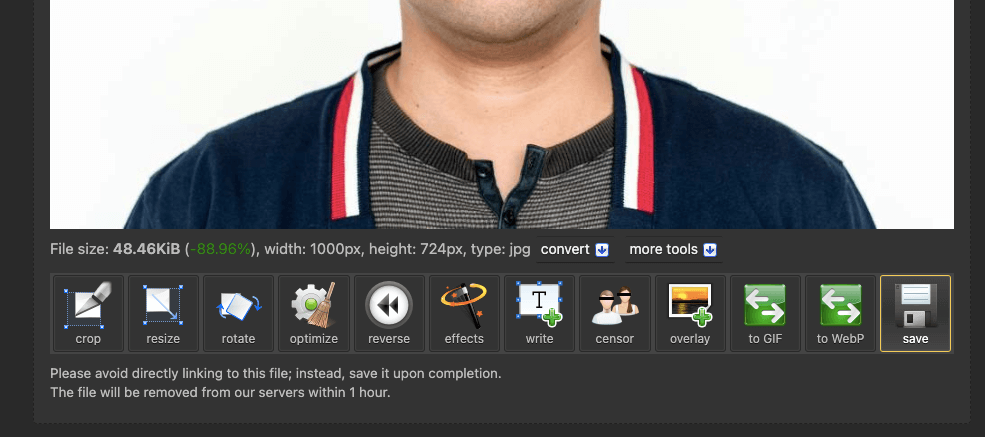
And now click “Optimize Image”
Once the image is resized, download the image by clicking Save.
Same thing you can do with signature scan.